How to Melt Hershey’s Chocolate in the Microwave: Quick and Easy Steps!
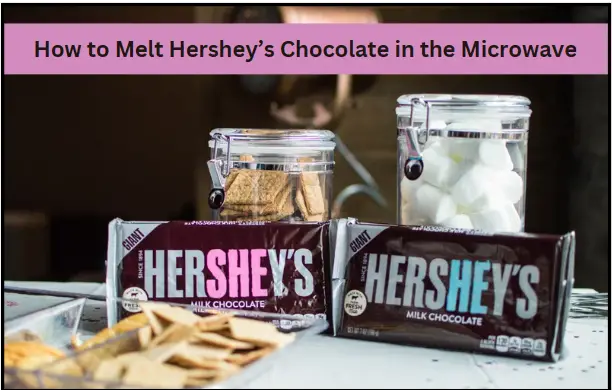
I love using Hershey’s chocolate in my baking, but sometimes melting it can be a bit of a challenge. Luckily, melting Hershey’s chocolate in the microwave is a quick and easy solution. With just a few simple steps, you can have perfectly melted chocolate that’s ready to use in all your favorite recipes.
Before you start melting your Hershey’s chocolate, it’s important to understand a few things about the chocolate itself. Hershey’s chocolate is made with cocoa butter, which means it has a lower melting point than other types of chocolate. This makes it easier to melt, but it also means that you need to be careful not to overheat it. If you heat the chocolate too much, it can become burnt or seized, which will ruin the texture and flavor.
To get started melting your Hershey’s chocolate in the microwave, you’ll need to prepare the chocolate by cutting it into small pieces and placing it in a microwave-safe bowl. Then, you’ll need to choose the right microwave settings and follow a few simple steps to ensure that the chocolate melts evenly and doesn’t burn. With a little practice, you’ll be able to melt Hershey’s chocolate in the microwave like a pro.
For melting Hershey’s chocolate, I find that 15-second intervals work best. Microwave the chocolate for 15 seconds, then remove it from the microwave and give it a stir. Repeat this process until the chocolate is melted and smooth. Be careful not to overheat the chocolate, as it can burn easily.
Key Takeaways
- Hershey’s chocolate has a lower melting point than other types of chocolate, so it’s important to be careful not to overheat it.
- To melt Hershey’s chocolate in the microwave, you’ll need to cut it into small pieces, choose the right microwave settings, and follow a few simple steps.
- With a little practice, melting Hershey’s chocolate in the microwave is a quick and easy way to prepare chocolate for all your favorite recipes.
Understanding Hershey’s Chocolate
I absolutely love Hershey’s chocolate, and I bet you do too! It’s creamy, delicious, and perfect for baking, snacking, or melting. But, before we dive into the best ways to melt Hershey’s chocolate in the microwave, let’s take a moment to understand what Hershey’s chocolate is made of.
Hershey’s chocolate is made from cocoa beans, sugar, and milk. The cocoa beans are roasted, ground, and then mixed with sugar and milk to create a smooth chocolatey mixture. Depending on the type of Hershey’s chocolate you’re using, the ratio of cocoa, sugar, and milk may vary.
Hershey’s chocolate comes in many different forms, including bars, chips, kisses, and more. Each type of Hershey’s chocolate has a slightly different composition, which can affect how it melts in the microwave.
For example, Hershey’s chocolate bars are thicker than Hershey’s chocolate chips, so they may take longer to melt in the microwave. Hershey’s kisses are smaller and have a higher proportion of cocoa butter, which makes them perfect for melting and dipping.
When it comes to the type of chocolate, Hershey’s offers a range of options, including milk chocolate, dark chocolate, and white chocolate. Milk chocolate is the most popular and has a creamy, sweet flavor. Dark chocolate has a higher percentage of cocoa and is slightly bitter. White chocolate is made from cocoa butter, sugar, and milk but doesn’t contain any cocoa solids.
Overall, Hershey’s chocolate is a delicious and versatile ingredient that can be used in a variety of recipes. Whether you’re baking a cake, making chocolate-covered strawberries, or just snacking on a piece of chocolate, Hershey’s has something for everyone.
Preparation Before Melting
I love melting Hershey’s chocolate in the microwave. It’s quick, easy, and always yields perfectly melted chocolate. But before I start melting, I make sure to do a few things to ensure that the process goes smoothly.
Choose a Microwave Safe Bowl
First, I choose a microwave-safe bowl. I prefer to use a glass bowl because it allows me to see the chocolate as it melts, but any heat-proof bowl will work. It’s important to use a bowl that is large enough to hold all of the chocolate you want to melt.
Ensure Cleanliness
Next, I make sure that the bowl is clean and dry. Any moisture in the bowl can cause the chocolate to seize and become lumpy. I also avoid using any utensils that are wet or have moisture on them.
Cut Large Chocolate into Smaller Pieces
If I’m melting a large amount of chocolate, I’ll chop it into small pieces before putting it in the bowl. This helps the chocolate melt more evenly and prevents it from overheating in some areas.
Grab All Utensils
Finally, I make sure that I have all of the utensils I need within reach. This includes a rubber spatula for stirring the chocolate and a dry spoon for scooping it out of the bowl. Having everything I need close by makes the melting process much easier and less stressful.
By following these simple steps, I can ensure that my Hershey’s chocolate melts perfectly every time.
Choosing the Right Microwave Settings
When it comes to melting Hershey’s chocolate in the microwave, choosing the right settings is crucial. Using the wrong power or time can cause the chocolate to burn or seize, ruining your entire batch. But don’t worry, with a few tips and tricks, you can easily melt Hershey’s chocolate in the microwave like a pro.
First, make sure you’re using a microwave-safe bowl. Glass or ceramic bowls work best, as they won’t transfer heat to the chocolate as quickly as plastic or metal. Next, chop your Hershey’s chocolate into small, even pieces. This will help it melt evenly and prevent any chunks from burning.
Now it’s time to choose your microwave settings. I recommend starting with a medium power setting, around 50%. This will give you more control over the melting process and prevent the chocolate from overheating. Depending on your microwave, you may need to adjust the power level or time slightly.
For melting Hershey’s chocolate, I find that 15-second intervals work best. Microwave the chocolate for 15 seconds, then remove it from the microwave and give it a stir. Repeat this process until the chocolate is melted and smooth. Be careful not to overheat the chocolate, as it can burn easily.
If you’re having trouble melting the chocolate evenly, try using the defrost setting on your microwave. This will provide a lower, more consistent heat that can help prevent hot spots. Just be sure to keep a close eye on the chocolate and stir it frequently.
In summary, when melting Hershey’s chocolate in the microwave, it’s important to use a microwave-safe bowl, chop the chocolate into small pieces, and choose the right power and time settings. Start with a medium power setting around 50%, and microwave in 15-second intervals, stirring frequently. If you’re having trouble, try using the defrost setting. With a little practice, you’ll be melting Hershey’s chocolate like a pro in no time!
Steps to Melt Hershey’s Chocolate in the Microwave
I absolutely love Hershey’s chocolate, and I know I’m not alone! Sometimes, though, it can be a bit tricky to melt it down to the perfect consistency for dipping or drizzling on desserts. Luckily, I’ve got the process down to a science, and I’m excited to share it with you!
Here are the steps I follow to melt Hershey’s chocolate in the microwave:
- First, I make sure to remove any foil wrapping from the chocolate. Foil can cause the chocolate to overheat and burn, so it’s important to remove it before microwaving.
- Next, I chop the chocolate into small, even pieces. This helps it melt more evenly and quickly. I usually use a sharp knife to do this, but you could also break the chocolate into pieces with your hands.
- I place the chopped chocolate into a microwave-safe bowl. It’s important to use a bowl that can withstand high temperatures without cracking or melting. Glass or ceramic bowls are usually the best choice.
- I microwave the chocolate on medium power for 15 seconds at a time, stirring after each interval. This helps to prevent the chocolate from overheating and seizing up. It’s important to stir thoroughly to ensure that all the chocolate is melting evenly.
- If the chocolate isn’t completely melted after the first few intervals, I continue microwaving it in 10-second increments, stirring after each one. It’s important not to overheat the chocolate, as this can cause it to seize up and become unusable.
- Once the chocolate is completely melted, I remove it from the microwave and stir it one final time. At this point, it should be smooth and glossy.
- If I’m using the melted chocolate for dipping or drizzling, I transfer it to a piping bag or zip-top bag with a small hole cut in the corner. This makes it easy to control the flow of the chocolate and create neat, precise lines.
Overall, melting Hershey’s chocolate in the microwave is a quick and easy process that can be used in a variety of recipes. Just be sure to follow these steps carefully, and you’ll be rewarded with perfectly melted chocolate every time!
Preventing and Fixing Burnt or Seized Chocolate
I love using Hershey’s chocolate for baking and melting. It’s delicious and easy to work with. However, sometimes things can go wrong, and the chocolate can burn or seize up. Here are some tips to prevent and fix burnt or seized chocolate when melting Hershey’s chocolate in the microwave.
Preventing Burnt Chocolate
The key to preventing burnt chocolate is to melt it slowly and carefully. Here are some steps:
- Chop the Hershey’s chocolate into small, uniform pieces. This will help it melt evenly.
- Place the chocolate in a microwave-safe bowl.
- Microwave the chocolate at 50% power for 30 seconds.
- Remove the bowl from the microwave and stir the chocolate.
- Repeat steps 3 and 4 until the chocolate is melted.
By melting the chocolate slowly and stirring it frequently, you can prevent it from burning.
Fixing Burnt Chocolate
If you do accidentally burn the chocolate, don’t worry. Here’s how you can fix it:
- Remove the bowl from the microwave immediately.
- Add a small amount of hot water to the chocolate and stir until the chocolate is smooth again.
- If the chocolate is still too thick, add more hot water, one teaspoon at a time, until it reaches the desired consistency.
Preventing Seized Chocolate
Seized chocolate is when the chocolate becomes stiff and grainy. This can happen if even a small amount of water gets into the chocolate. Here’s how you can prevent seized chocolate:
- Make sure all utensils and equipment are completely dry before using them.
- Avoid using wooden spoons, which can retain moisture.
- Don’t let any water get into the chocolate.
Fixing Seized Chocolate
If your Hershey’s chocolate has seized up, don’t worry. You can still salvage it. Here’s how:
- Remove the bowl from the microwave immediately.
- Add a small amount of vegetable oil to the chocolate and stir until the chocolate is smooth again.
- If the chocolate is still too thick, add more vegetable oil, one teaspoon at a time, until it reaches the desired consistency.
By following these tips, you can prevent and fix burnt or seized Hershey’s chocolate when melting it in the microwave. Happy baking!
Incorporating Other Ingredients
I am excited to share with you some tips on how to incorporate other ingredients into melted Hershey’s chocolate to create a delicious and unique treat. Adding ingredients such as milk, butter, cream, sugar, and cocoa butter can enhance the flavor and texture of your melted chocolate.
Milk
When adding milk to melted chocolate, it is important to use whole milk or heavy cream to prevent the chocolate from seizing. Start by heating the milk or cream in a separate bowl and gradually add it to the melted chocolate while stirring continuously. This will create a smooth and creamy texture that is perfect for dipping or drizzling over desserts.
Butter
Butter is another great ingredient to add to melted chocolate. It adds richness and depth of flavor. To incorporate butter, simply melt it in a separate bowl and gradually add it to the melted chocolate while stirring continuously. This will create a smooth and glossy texture that is perfect for making truffles or frosting cakes.
Sugar
Sugar can also be added to melted chocolate to create a sweeter treat. However, it is important to use powdered sugar instead of granulated sugar to prevent the chocolate from becoming grainy. Simply sift the powdered sugar into the melted chocolate and stir until fully incorporated.
Cocoa Butter
Cocoa butter is a great ingredient to add to melted chocolate to increase its cocoa butter content. This will create a smoother texture and enhance the chocolate flavor. Simply melt the cocoa butter in a separate bowl and gradually add it to the melted chocolate while stirring continuously.
Lastly, baking chocolate can also be added to melted Hershey’s chocolate to create a richer and more complex flavor. Simply melt the baking chocolate in a separate bowl and gradually add it to the melted chocolate while stirring continuously.
Incorporating other ingredients into melted Hershey’s chocolate is a great way to create unique and delicious treats. Experiment with different combinations and ratios to find your perfect recipe.
Using Melted Chocolate in Desserts
I absolutely love using melted Hershey’s chocolate in my desserts! It’s incredibly versatile and can be used in so many ways. Here are some of my favorite ways to use melted Hershey’s chocolate:
Dipping
One of the easiest ways to use melted Hershey’s chocolate is as a dipping sauce. Simply melt the chocolate in the microwave or on the stovetop, and then dip your favorite fruits, cookies, or other treats into the chocolate. I love dipping strawberries, pretzels, and marshmallows in melted Hershey’s chocolate. It’s the perfect sweet treat!
Drizzle
Another great way to use melted Hershey’s chocolate is to drizzle it over your desserts. You can drizzle it over cakes, cupcakes, cookies, and more. I love drizzling melted chocolate over my chocolate chip cookies for an extra chocolatey treat!
Glaze
Melted Hershey’s chocolate can also be used as a glaze for cakes and other baked goods. Simply melt the chocolate and then pour it over your baked goods. You can also add a little bit of cream or butter to the chocolate to make it smoother and easier to work with.
Fondue
If you’re looking for a fun and interactive dessert, try making a chocolate fondue with melted Hershey’s chocolate. Simply melt the chocolate and then serve it in a fondue pot with your favorite fruits, cookies, and other treats for dipping.
Ice Cream Topping
Melted Hershey’s chocolate is also a great topping for ice cream. Simply drizzle the melted chocolate over your favorite ice cream flavors for a delicious and indulgent treat.
Wax Coat
Did you know that Hershey’s chocolate was originally used to coat wax paper cups for drinking chocolate? While I don’t recommend eating wax, it’s still a fun fact to know!
Cacao Beans
Hershey’s chocolate is made from cacao beans, which are grown in tropical regions around the world. The beans are harvested and then roasted to bring out their chocolatey flavor. Hershey’s then takes these roasted cacao beans and turns them into the delicious chocolate that we all know and love.
So there you have it! These are just a few of the many ways that you can use melted Hershey’s chocolate in your desserts. Get creative and have fun experimenting with different recipes and techniques!
Understanding the Texture and Consistency
I love Hershey’s chocolate, and melting it in the microwave is one of the easiest ways to enjoy it. However, if you’re not careful, you can end up with a lumpy, grainy mess instead of a smooth and shiny chocolate. In this section, I will share some tips on how to achieve the perfect texture and consistency when melting Hershey’s chocolate in the microwave.
First, it’s important to understand that Hershey’s chocolate has a unique texture and consistency. It’s not as smooth and creamy as other types of chocolate, and it can be prone to lumps and graininess if not melted properly. That’s why it’s crucial to use medium heat when melting Hershey’s chocolate in the microwave. High heat can cause the chocolate to overheat and become grainy, while low heat can cause the chocolate to seize up and become clumpy.
Another thing to keep in mind is that chocolate contains a lot of fat, which means it can generate a lot of steam when heated. This steam can cause condensation to form on the sides of the bowl, which can then drip into the chocolate and cause it to seize up. To prevent this from happening, I recommend covering the bowl with a piece of plastic wrap or a microwave-safe lid. This will help trap the steam and prevent condensation from forming.
When melting Hershey’s chocolate in the microwave, it’s also important to stir it frequently. This will help distribute the heat evenly and prevent any hot spots from forming. If you notice any lumps or clumps in the chocolate, don’t panic! Simply stir vigorously until they dissolve. You can also try adding a small amount of vegetable oil or shortening to the chocolate, which can help smooth out any lumps or graininess.
Finally, when your Hershey’s chocolate is fully melted, it should have a shiny and glossy appearance. If it looks dull or grainy, it may have been overheated or exposed to too much moisture. In this case, you may need to start over with a fresh batch of chocolate.
In conclusion, melting Hershey’s chocolate in the microwave can be a quick and easy way to enjoy this delicious treat. By using medium heat, covering the bowl, stirring frequently, and paying attention to the texture and consistency, you can achieve a smooth and shiny chocolate that’s perfect for dipping, drizzling, or eating straight out of the bowl.
Safety Measures and Tips
Melting Hershey’s chocolate in the microwave is a quick and easy process, but it’s important to take some safety measures to avoid any accidents. Here are some tips to ensure a smooth and safe melting process:
- Use a heat-proof bowl: When melting chocolate in the microwave, it’s important to use a heat-proof bowl that can withstand high temperatures. Glass or ceramic bowls are great options.
- Avoid water droplets: Water droplets can cause chocolate to seize and become lumpy. Make sure your bowl and utensils are completely dry before melting the chocolate.
- Don’t overheat: Chocolate can easily burn if it’s heated for too long or at too high of a temperature. Use the microwave at medium power and heat the chocolate in short intervals, stirring in between, until it’s fully melted.
- Consider using a double boiler: If you’re not comfortable melting chocolate in the microwave, you can use a double boiler instead. Simply place a heat-proof bowl over a pot of simmering water and stir the chocolate until it’s melted.
- Use caution when making dipping sauce: If you’re using melted chocolate as a dipping sauce, make sure it’s not too hot before dipping in any food. Hot melted chocolate can burn easily, so let it cool down a bit before using.
By following these tips and taking some safety measures, you can easily melt Hershey’s chocolate in the microwave without any accidents or mishaps.
Frequently Asked Questions
What’s the best chocolate for melting?
I find that Hershey’s chocolate chips or bars are great for melting in the microwave. Make sure to choose a chocolate with a cocoa butter content that ranges between 32% to 39% to melt for dipping sauce. It will help the chocolate to melt faster and smoother.
How can I melt chocolate in the microwave without burning it?
To melt chocolate in the microwave without burning it, chop the chocolate into small pieces and place them in a microwave-safe bowl. Microwave the chocolate in 15-second intervals on medium heat, stirring in between each interval until the chocolate is melted and smooth. Be sure to stir the chocolate every time you take it out of the microwave to ensure it melts evenly and doesn’t burn.
How long should I melt chocolate in the microwave?
The amount of time it takes to melt chocolate in the microwave depends on the amount of chocolate and the wattage of your microwave. Start by microwaving the chocolate in 15-second intervals on medium heat, stirring in between each interval until the chocolate is melted and smooth.
What’s the best way to melt chocolate in the microwave for dipping?
To melt chocolate in the microwave for dipping, chop the chocolate into small pieces and place them in a microwave-safe bowl. Microwave the chocolate in 15-second intervals on medium heat, stirring in between each interval until the chocolate is melted and smooth. Once the chocolate is melted, dip the item you want to coat in the chocolate and let it cool.
How can I melt Hershey’s chocolate for strawberries?
To melt Hershey’s chocolate for strawberries, chop the chocolate into small pieces and place them in a microwave-safe bowl. Microwave the chocolate in 15-second intervals on medium heat, stirring in between each interval until the chocolate is melted and smooth. Once the chocolate is melted, dip the strawberries in the chocolate and let them cool.
Can I use butter to melt chocolate in the microwave?
I do not recommend using butter to melt chocolate in the microwave. Butter contains water and can cause the chocolate to seize up and become grainy. Stick to melting chocolate in the microwave using the method described above for best results.


